Showing posts with label Decorating. Show all posts

Thursday, 21 February 2013

Home Decor: Blue and Yellow

Last week I finally managed to add some decorating touches to our living room. It started with the blue wall (which I chose because of Feng Shui - it's represents the element of water).
The room felt quite cold, so I decided to add yellow
to balance it.


This yellow painting by my artist friend Lorna Wilson sets the tone for the whole room. I really love it.
The cushions below are from my Hatome shop.


Our sofa bed (from Ikea) is very useful for the guests' sleepovers but it is also very deep. To make it more comfortable for sitting, I made three over-sized cushions using vintage fabric from the 60s and 70s - in blue and yellow of course. You can read about making these cushions here.


I also made a temporary cover for an old armchair, which makes the chair look contemporary and fresh. On top of it you can see small 'Honeybee' cushion, made partly with the same stripy fabric.


This was my little adventure with blue and yellow.


Share/Bookmark

Thursday, 13 December 2012

Learning Screen Printing on fabric

Yesterday I finished the course 'Screen Printing on Fabric'. I have been thinking of learning this technique for a long time and finally I went for it.

Over 3 Wednesdays I have been learning the basics of various screen printing techniques. My teacher was Katy Goutefangea from the East London Printmakers. There were six of us students, all very eager to see our ideas printed.


The first day was very difficult for me. I didn't manage to produce one single good print and my many pieces of fabric, instead of becoming beautiful bags and cushions, became rugs to clean the printing tables with. This was quite disheartening.

But later on I started to make good prints. This is a cushion I made with one of the prints:


And I made this print, using my husband's old shirt. I was delighted with it. He loved it too, but warned me not to expect him to wear it every day. Pity...


I also printed some monkeys on the curtains which will hang in our dining room.
Katy is a wonderful teacher. I enjoyed this course so very much and I soon forgot how difficult it seemed in the beginning.

East London Printmakers is a free access printing studio located at the Space Studios in Hackney.
For the details click here.


Share/Bookmark

Monday, 10 December 2012

Honeybees Cushions

I must admit a have a little fixation about the honeybees. I have always loved them and have been fascinated by them. I often read about the life of honeybees, about the amazing healing properties of honey and other bees products. I feel very passionate about our little friends. They are responsible for maintaining the majority of our food supply and they are now in serious danger. In Britain more and more people are aware of it and keep the beehives in their gardens, even in the big cities.


Some time ago I designed 2 artists books about the honeybees. Now I am making the cushions with honeybees appliques.


I would keep the beehives in the garden but it is a big commitment for which I am not ready.


Instead I plant Honeybee friendly plants and make sure I do not use the chemicals which are dangerous for them.


You can see more cushions here: www.hatome.co.uk


Share/Bookmark

Wednesday, 18 July 2012

Abstract Art for Children

I recently found myself painting almost abstract pictures for children. Here are some examples:


I guess it is quite important to train a child from early age to appreciate art and expose them to different forms of art. Then later they will make confident choices when it comes to all sorts of designs and esthetics in life.

I still remember vividly the paintings and prints on my parents walls when I was a child. I used to watch them for a long time and get lost in my imagination.


Colors and shapes are inspiring. They feed your soul. They can lift up your mood and make you feel happy for no reason.


To see more go to www.yolantaprints.etsy.com


Share/Bookmark

Monday, 2 July 2012

Pictures inspired by Crystal Palace

I live in South London, in the area close to Crystal Palace Park. I will write about this special place more in another post, as it really deserves it, but today I wanted to share with you my two new paintings inspired by Crystal Palace.

The first picture is my free take on the iconic Crystal Palace TV Transmitter:


I paint in Ecoline watercolors (by Talens), which are my favorite. The colors have amazing luminosity. Here is the detail of this painting:


There are a lot of dinosaurs and other prehistoric creatures in the park (well, only concrete ones...), so my next picture is showing one of the dinosaurs:


The pictures look good together on the Mid Century sideboard in my studio:


You can see more at www.yolantaprints.etsy.com


Share/Bookmark

Friday, 29 June 2012

Yolanta Prints on Etsy

I am very excited! Yesterday I finally opened my art shop on Etsy, called Yolanta Prints. It contains the first four items to begin with, but I will be listing new items almost on daily basis. This is the first item, the Elephant. It's good to start with an elephant, as it is a magical animal. It is also connected to Shri Ganesha, Indian God of innocence and wisdom, who has the body of a child and the head of an elephant. He removes all obstacles.


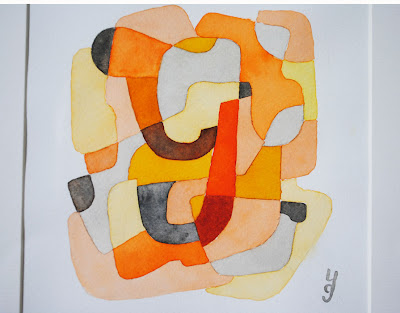
In Yolanta Prints shop I am selling limited edition prints of my original watercolor illustrations. The prints are signed and numbered and sold unframed. Here is another print, a little abstraction with a letter 'Y'.


To see more, please visit my shop: http://www.etsy.com/shop/YolantaPrints?ref=si_shop

I am having fun with this series. I am focusing on painting, painting, painting and it feels good. 

See you soon
Yolanta
Share/Bookmark

Thursday, 26 April 2012

Before and after

I am back. Sorry I have been away for so long. There was a lot of work to do in the house and it took all my energy. Also, I was forever looking for things. Now the renovation is almost finished and we have started to unpack. So I am showing you the first 'before and after' pictures. This is what our living room/library looked like when we moved in:


And this is what it looks like now:


We bought two more bookcases to accommodate all the books we have. And while filling the shelves with them, I also filled three bags of books to go to the charity shops.

I got this wonderful yellow painting from my very good friend and an amazing artist, Lorna Wilson. See her other paintings here.


I have chosen blue for this corner of the room because of Feng Shui. It represents the element of water. Instead of hanging the curtains in the windows, I used self-adhesive film to block the view from the street and let the light in.


On the shelf you can see the sculpture by my aunt, Jadwiga Janus. She began her art career in the sixties and is a well known artist in Poland. I love her work.

This is just the beginning. I hope our home will evolve with time and acquire it's own character naturally.

Yolanta


Share/Bookmark

Saturday, 3 September 2011

How to make a Driftwood Frame

Some time ago, I collected some driftwood at the beach in Folkestone (the best time to do it is after the storm, when the beach is full of treasures thrown out by the sea). Today I will describe how to make this simple Driftwood Frame:


Apart from the driftwood, I used a small framed mirror which I bought at a charity shop. You can use any frame which is flat and wide enough to provide a space for the driftwood to be glued to it. I also used a glue gun, a piece of fine sand paper and small pair of pliers.


First I sanded the frame, taking care to sand the edges nicely without scratching the mirror in the process. I wiped the frame clean with a cloth.


Then I started to arrange the flat pieces of driftwood on the frame. Whenever a piece of driftwood was too long, I broke off the end with the pliers and sanded it down. I did not glue the pieces to the frame yet.


When I had the frame covered with the flat pieces of driftwood, I carefully glued the driftwood to the frame with the glue gun. Be careful not to burn your fingers with the hot glue (like I did).


With all the flat pieces of driftwood glued to the frame, I arranged several more on top to cover the gaps and to make the driftwood frame look more interesting. I then glued the last pieces to the first layer of driftwood. Now the driftwood frame is ready:


Happy frame making :)

Yolanta
Share/Bookmark

Thursday, 18 August 2011

Garden party in the forest

Our post-wedding garden party in the forest happened as planned last Saturday, in Poland.
About 40 guests arrived despite the rainy start to the day. After the rain stopped I finally hung the bunting decorations I have been preparing for this occasion.


Luckily the rain stayed away for the rest of the evening. Children (and adults) could play outside.
This little dolls house was a nice decoration too.


To decorate the tables we used the glass lanterns which we prepared in June. They were filled with Citronella candles to discourage the mosquitoes.


We also used Rowan tree branches to decorate the tables. Here you can see them, filling little yellow buckets.

After the snacks we served many different salads (prepared by my sister Gosia and me) and the main dish: Bigos, which is a delicious Polish specialty. I will write about Bigos separately, it deserves it.


My friends and I:


And finally: the Wedding Cake (actually, there were 3 of them), delivered to the table by my niece, Marcelina. She also made a beautiful plum cake.


It was a good party. Pity that some of the family members and friends could not be there. Our family lives in many different countries...

I hope you enjoyed this little story.
Yolanta :)


Share/Bookmark

Tuesday, 19 July 2011

How to make a simple patchwork bunting

In preparation for our party in the forest, I have been making the bunting. I wanted to make something different from the usual triangular shape of the flags and I decided to make a simple square patchwork bunting using the leftover cotton fabric.


But first I looked at the pieces of fabric I had available and gathered them into three groups, with the intention of making three different kinds of bunting, starting from the simple patchwork one.


I decided to use pink, red and beige fabric for my patchwork bunting. The flags were to be made with the simple squares on one side and, on the other side, the squares made with the triangles sewn together.

I cut the first 15 x 15cm (6" x 6") square, then I folded the fabric several times, using the first square for measurement (you can make a paper square first if you prefer). I cut the fabric along the edges of the square, cutting through several layers of fabric to save time.


Next I cut the slightly bigger, 16.5 x 16.5cm squares and cut them in half along the diagonal to make the triangles. These triangles will be sewn together in pairs of contrasting colors and they will form the squares.


I continued to cut the smaller squares and the triangles (which were cut out of the bigger squares), using different colored fabric, making sure that in the end I had twice as many triangles as the squares.


I also cut the strips of pink fabric (4cm wide) and sewed them together to make a long tape (about 15 meters long) for inserting the bunting flags into it.


I started to sew the pairs of triangles together to form the squares.


Then I ironed the newly formed squares. They were now the same size as the smaller squares, about 15 x 15cm.


I paired the patchwork squares with the simple squares ...


... and I sewed the pairs together on three sides, leaving one side open.


After cutting the excess of fabric from the edges, I clipped the corners slightly in order to make it easier to turn the pieces inside out.


And after turning all the pieces inside out, I sewed them close to the edges on three sides.


I placed all the pieces on the table, grouping them according to the colors, and I decided on the order of how they were going to be sewn into the tape. Then I sewed them into the pink strip, placing the strip on top of the open side of the plain square (not the patchwork one), allowing the space of about 10cm between each square.


I finished by folding the edges of the strip and sewing the strip on top of the patchwork side of the squares.


After I have ironed it, the patchwork bunting is now ready:


Happy making :)

Yolanta
Share/Bookmark