Showing posts with label Cushions. Show all posts

Sunday, 24 February 2013

How to sew a cushion cover with a concealed zipper

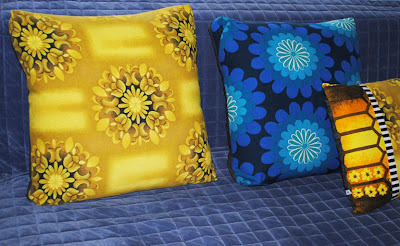
Today I will tell you how to sew a simple cushion cover with a neatly concealed zipper. I made my cushion quite large, as I needed it for our large sofa bed, but you can make it any size you want.


To make this cushion you will need a cushion filler pad and some fabric. I made it using two different vintage fabrics. You will also need the zipper. Measure your filler pad across from seem to seem and add 2.5cm (1") to it. This will be your measurement for cutting the square of fabric for the top of the cushion. For example your pad is 22" from seem to seem, so your fabric square will measure 23" x 23"cm on each side.

The zipper will be in the middle of the back of the cushion so you need to cut 2 pieces of fabric for the back. To get the measurements for the back pieces, add 5cm (2") to the front piece measurement and divide it by 2 (23"+2" = 25"; 25":2 = 12.5"). Your 2 back pieces will measure 12.5" x 23" each.

The zipper should be about 5cm (2") or more shorter than the measurement from seem to seem of the filler pad.


Machine sew one of the long edges in both back pieces with zigzag stitch. To make it easier to sew the zipper in, first fold and iron the edges on one side. Fold one piece 1.5cm (0.5") from the edge of the fabric and the other 2.5cm (1") from the edge.


Take the piece with narrower fold and using the pins secure the zipper in place, starting about 1.5" from top edge, making sure the zipper is positioned the same distance away from top and bottom edges of the fabric.


Change the foot in your sewing machine to a zipper foot and sew in one side the zipper.


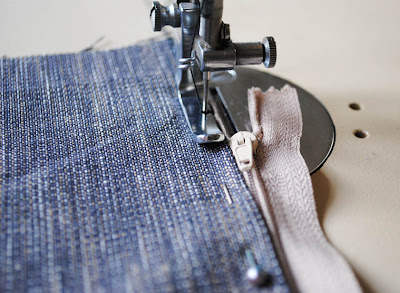
Position the other piece of fabric (with wider fold) over the zipper so that the two fabric pieces overlap by about 1 cm (less that half inch) and secure with pins. Mark 2 places where the soft zipper ends are and secure with pins like in the photo:


Start sewing in the other side of the zipper. When you get to the marker across, sew this place 3 times, to make the stitch hold the zipper strongly in place. Continue sewing along the pins, removing them just before you get to them with machine needle.


When you reach the end side of the zipper, repeat the triple stitch action where the pin marker is and continue sewing to the end.


This is what the zipper should look like:


Place the back piece of cushion cover on top of the front piece with good sides facing each another. Cut away any uneven edges and secure 2 pieces together with pins. Make sure you zipper is unzipped enough for you to insert your hand inside. You will need it to fold the cushion cover inside out later on.


Change the foot  in your sewing machine to standard one. Sew 2 pieces of cushion cover together 1.5cm (over 0.5") from the edges and finish off with zigzag stitch.


You can also fold the corners and sew them across, but it is optional.


Fold the cushion cover inside out and iron the stitches. Insert the filler pad. Your cushion is ready.


Happy sewing!


Share/Bookmark

Thursday, 13 December 2012

Learning Screen Printing on fabric

Yesterday I finished the course 'Screen Printing on Fabric'. I have been thinking of learning this technique for a long time and finally I went for it.

Over 3 Wednesdays I have been learning the basics of various screen printing techniques. My teacher was Katy Goutefangea from the East London Printmakers. There were six of us students, all very eager to see our ideas printed.


The first day was very difficult for me. I didn't manage to produce one single good print and my many pieces of fabric, instead of becoming beautiful bags and cushions, became rugs to clean the printing tables with. This was quite disheartening.

But later on I started to make good prints. This is a cushion I made with one of the prints:


And I made this print, using my husband's old shirt. I was delighted with it. He loved it too, but warned me not to expect him to wear it every day. Pity...


I also printed some monkeys on the curtains which will hang in our dining room.
Katy is a wonderful teacher. I enjoyed this course so very much and I soon forgot how difficult it seemed in the beginning.

East London Printmakers is a free access printing studio located at the Space Studios in Hackney.
For the details click here.


Share/Bookmark

Monday, 10 December 2012

Honeybees Cushions

I must admit a have a little fixation about the honeybees. I have always loved them and have been fascinated by them. I often read about the life of honeybees, about the amazing healing properties of honey and other bees products. I feel very passionate about our little friends. They are responsible for maintaining the majority of our food supply and they are now in serious danger. In Britain more and more people are aware of it and keep the beehives in their gardens, even in the big cities.


Some time ago I designed 2 artists books about the honeybees. Now I am making the cushions with honeybees appliques.


I would keep the beehives in the garden but it is a big commitment for which I am not ready.


Instead I plant Honeybee friendly plants and make sure I do not use the chemicals which are dangerous for them.


You can see more cushions here: www.hatome.co.uk


Share/Bookmark

Thursday, 15 November 2012

Hatome Cushions with Mid Century feel

My little Hatome brand is growing!
Here are a few new cushions I have made using Mid Century fabrics which I have been collecting for a long time. I am finally putting them to good use.


This one has a fairytale theme and it would be also suitable for a children's room:


I used some vintage and some new Japanese fabric to sew this one:


The backs of the cushions are made with a contrasting colored thick cotton fabric, with a neatly concealed zipper.


Te cushion covers can be machine washed at the temperature of 30 degrees C.
Here is the link to Hatome shop on Folksy (UK online marketplace for arts and crafts):

www.hatome.co.uk


Share/Bookmark