Showing posts with label Garden. Show all posts

Sunday, 25 August 2013

Daily crop from our garden

There is nothing to compare it with, this satisfying feeling of growing your own food. This is today's crop: tomatoes, cucumbers, courgettes and mint. They are fragrant and very very tasty. They taste like Summer, like childhood...


Many more vegetables are growing in our garden. The beans will be ready soon. I planted them quite late this year.


In the greenhouse sweet tomatoes are quietly ripening ....


while outside the lilies are in full bloom.


We planted miniature Japanese Maple in the flower bed and it is doing pretty well.


My husband only cut the lawn twice this Summer, letting the wild flowers grow in the grass. It is so nice to see the bees and the butterflies buzzing ... All is well in the garden.

I hope you enjoyed this little garden story.


Share/Bookmark

Monday, 20 May 2013

Garden work in progress

The Spring is here at last, after the longest Winter I can remember. I have been very busy in the garden, although my energy level is not great. We need sun!!!


We moved into our house just over a year ago. Our new place hasn't been modernized since the 1950s and needed a total renovation. The same with the garden. Here is the view of the green house, a year ago it was filled with self seeded brambles. Many of the glass panels were missing.


Last year the brambles were removed and burned in a big bonfire. We repaired the green house and had a new concrete floor put in. This year I started planting the vegetable seeds in trays.


I also planted some hardy perennials. The next step will be preparing the flower and vegetable beds and replanting the seedlings.


But for the time being we just enjoy the garden and a moment of sunshine. I hope the rain stays away because our tomato plants have just started to flower in the green house and they need to be pollinated by Bumblebees.


Share/Bookmark

Saturday, 15 December 2012

Merry Christmas !

Just a couple of wintery photographs from our frozen garden. Winter has come early to England this year.


Have a Very Happy Christmas everyone! Please visit my blog again in the New Year.

Lots of love
Yolanta


Share/Bookmark

Monday, 10 December 2012

Honeybees Cushions

I must admit a have a little fixation about the honeybees. I have always loved them and have been fascinated by them. I often read about the life of honeybees, about the amazing healing properties of honey and other bees products. I feel very passionate about our little friends. They are responsible for maintaining the majority of our food supply and they are now in serious danger. In Britain more and more people are aware of it and keep the beehives in their gardens, even in the big cities.


Some time ago I designed 2 artists books about the honeybees. Now I am making the cushions with honeybees appliques.


I would keep the beehives in the garden but it is a big commitment for which I am not ready.


Instead I plant Honeybee friendly plants and make sure I do not use the chemicals which are dangerous for them.


You can see more cushions here: www.hatome.co.uk


Share/Bookmark

Tuesday, 30 October 2012

My local discovery - Alexandra Nurseries Cafe

It was a beautiful sunny day today here in South London and I could not resist going out before locking myself up in the studio to work.

I went for a walk around the local streets in Penge where I live. Some time ago I discovered Alexandra Nurseries and somehow I my feet took me there again. Oh, the pull of the Flour-less Orange Cake!

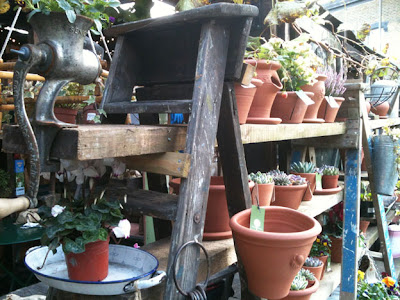
Alexandra Nurseries is a small family owned plant nursery, vintage garden shop and a cafe. It is tucked in between small Victorian cottages in a hidden corner of Penge. It opened in April this year.

My eye was pulled to the lovely pumpkin display by the entrance:


This place is always a feast for the eyes, full of colour and exciting new arrivals. Today I bought some Parrot Tulip bulbs to plant in our front garden.


So.... the Flour-less Orange Cake, what can I say? Yum yum and yum! It is made with ground almonds and it tastes like heaven. I had it with a delicious cup of English Breakfast tea.


Apart from serving a wonderful variety of cakes, tea and coffee, Alexandra Nurseries sells interesting plants, garden objects, vintage crockery and other things.


It is an inspiring and friendly place. Come and see for yourself.
Here is the link http://alexandranurseries.co.uk/


Share/Bookmark

Sunday, 11 September 2011

Collecting the seeds

This is just a short post as we have already started packing before our move. The funny thing is that we are still waiting for the mortgage offer to buy our new (old) house, but we have started packing regardless. We already went through several disappointments and delays in the process, so it feels like now is the time to show faith and act in a positive way. So we are taking a plunge - we are packing.


I am already planning our future garden and thinking about what kind of plants would grow well there. A good way of choosing plants is by looking at other people's gardens in the same area and seeing what grows well. Plants can be expensive, so I decided to propagate as many as I can myself. Now is a good time to buy last season's seeds at a discounted price (just check the expiry date). And yesterday we went for a walk to the local park and I collected several seeds.

I put them in paper envelopes to keep them dry. Here they are all lined up on the kitchen top:


I will investigate which seeds can go straight into the garden soil in the Spring and which ones need to be placed in the cold frame before the Winter. I will be making the cold frame myself and blogging about it. Actually, hopefully I will be blogging about all the progress of our house and garden work, with lots of pictures of 'before' and 'after'.

Happy seed collecting
Yolanta
Share/Bookmark

Thursday, 18 August 2011

Garden party in the forest

Our post-wedding garden party in the forest happened as planned last Saturday, in Poland.
About 40 guests arrived despite the rainy start to the day. After the rain stopped I finally hung the bunting decorations I have been preparing for this occasion.


Luckily the rain stayed away for the rest of the evening. Children (and adults) could play outside.
This little dolls house was a nice decoration too.


To decorate the tables we used the glass lanterns which we prepared in June. They were filled with Citronella candles to discourage the mosquitoes.


We also used Rowan tree branches to decorate the tables. Here you can see them, filling little yellow buckets.

After the snacks we served many different salads (prepared by my sister Gosia and me) and the main dish: Bigos, which is a delicious Polish specialty. I will write about Bigos separately, it deserves it.


My friends and I:


And finally: the Wedding Cake (actually, there were 3 of them), delivered to the table by my niece, Marcelina. She also made a beautiful plum cake.


It was a good party. Pity that some of the family members and friends could not be there. Our family lives in many different countries...

I hope you enjoyed this little story.
Yolanta :)


Share/Bookmark

Wednesday, 27 July 2011

Making plum jam

Our plum tree took us by surprise this year. After years of not producing any fruit worth mentioning, it exploded with an abundance of succulent pinky plums. I have never eaten more delicious plums in my life. And there are so many of them! Not only are we having them and the birds having them, but also our neighbors helped themselves (some invited and some not). And the tree keeps on producing. Maybe it has something to do with the fact that I pruned the tree heavily in early Spring, although later I learned from TV that you are not supposed to prune the plum trees drastically as this might finish them off ... Whatever it was, it worked.


We couldn't eat the plums fast enough so I decided to make a plum jam. The recipe I used is a simple and quick one. I used:
•  4 kg of plums
•  two lemons (they help to keep the jam color lighter)
•  3.5 kg of jam sugar (this is sugar with added pectin which helps to set the jam so it can be prepared quickly and the fruit remains fresher)
•  and a bit of butter.
I also prepared a big size stainless steel cooking pot and a small plate which I later used for testing if the jam is ready.

I washed the recycled jars and sterilized them by putting them in the oven, set to 100 degrees Celsius (only the jars, not the jar tops) for about 30 minutes. I sterilized the jar tops by putting them in a bowl and pouring boiling water over them to cover them completely and I left them there for about 10 minutes, then I dried them. You can also use the hot jars straight from the dishwasher, but they have to be really hot.


I put the little plate in the fridge to cool. After washing the plums I removed the stones and cut the plums into little pieces. I put them in the pot together with the juice of two lemons and cooked them slowly until they became quite liquid. Do not allow it to boil at this stage.

I added the jam sugar and stirred until the sugar was dissolved, being careful not to boil the mixture. I added two knobs of butter, then increased the heat to the maximum and boiled the jam for about 10 minutes. You can stir to help the water to evaporate.


Now it was time to make a test. I took the plate from the fridge and poured a little jam on it. I left it for a minute, then tried to push the jam sample with a spoon. If the surface wrinkles the jam is ready. If it doesn't wrinkle, cook the jam for a few more minutes and do the test again.

It is very important to pour the hot jam into hot jars, the hotter the better. I wore thick rubber gloves while handling the hot jars. I used the funnel to fill the jars with jam and wiped the edges clean before closing the jars firmly.


As the jars with jam cool down, they close even more tightly.

We are going to eat this jam not only with scones and pancakes but I will also add it to apples when I make a crumble desert.


I must say jam making was very satisfying. Not only did it give me a nice feeling of creating something delicious that will be enjoyed for months to come by us and our friends, but it was also very inexpensive, as I took what was available and made something yummy with it.

Happy jam making
Yolanta :)
Share/Bookmark

Tuesday, 19 July 2011

How to make a simple patchwork bunting

In preparation for our party in the forest, I have been making the bunting. I wanted to make something different from the usual triangular shape of the flags and I decided to make a simple square patchwork bunting using the leftover cotton fabric.


But first I looked at the pieces of fabric I had available and gathered them into three groups, with the intention of making three different kinds of bunting, starting from the simple patchwork one.


I decided to use pink, red and beige fabric for my patchwork bunting. The flags were to be made with the simple squares on one side and, on the other side, the squares made with the triangles sewn together.

I cut the first 15 x 15cm (6" x 6") square, then I folded the fabric several times, using the first square for measurement (you can make a paper square first if you prefer). I cut the fabric along the edges of the square, cutting through several layers of fabric to save time.


Next I cut the slightly bigger, 16.5 x 16.5cm squares and cut them in half along the diagonal to make the triangles. These triangles will be sewn together in pairs of contrasting colors and they will form the squares.


I continued to cut the smaller squares and the triangles (which were cut out of the bigger squares), using different colored fabric, making sure that in the end I had twice as many triangles as the squares.


I also cut the strips of pink fabric (4cm wide) and sewed them together to make a long tape (about 15 meters long) for inserting the bunting flags into it.


I started to sew the pairs of triangles together to form the squares.


Then I ironed the newly formed squares. They were now the same size as the smaller squares, about 15 x 15cm.


I paired the patchwork squares with the simple squares ...


... and I sewed the pairs together on three sides, leaving one side open.


After cutting the excess of fabric from the edges, I clipped the corners slightly in order to make it easier to turn the pieces inside out.


And after turning all the pieces inside out, I sewed them close to the edges on three sides.


I placed all the pieces on the table, grouping them according to the colors, and I decided on the order of how they were going to be sewn into the tape. Then I sewed them into the pink strip, placing the strip on top of the open side of the plain square (not the patchwork one), allowing the space of about 10cm between each square.


I finished by folding the edges of the strip and sewing the strip on top of the patchwork side of the squares.


After I have ironed it, the patchwork bunting is now ready:


Happy making :)

Yolanta
Share/Bookmark